Porcelain and ceramic tiles are popular flooring and wall finishes in Dubai homes, apartments, villas, offices, hotels, restaurants, and commercial buildings. They are durable, attractive, and relatively easy to maintain, but using the wrong cleaning products or techniques can damage their finish, weaken grout, leave cloudy marks, or cause stubborn residue to build up over time.
The safest way to clean porcelain and ceramic tiles is to use a suitable pH-neutral cleaner, warm water, a soft mop or microfiber cloth, and the correct technique for the tile’s surface. However, the best cleaning method depends on whether the tiles are glazed, unglazed, polished, textured, or installed in areas exposed to grease, soap, hard water, or heavy foot traffic.
In the UAE, dust, sand, construction residue, humidity, and mineral deposits from water can make regular tile maintenance particularly important. Understanding how to clean different tile types helps homeowners protect their flooring, preserve its appearance, and avoid unnecessary repair or replacement costs.
Understanding the Difference Between Porcelain and Ceramic Tiles
Porcelain and ceramic tiles are both made from clay-based materials, but they differ in their composition, manufacturing process, and water absorption. These differences influence their performance and the cleaning methods that are most suitable for them.
Porcelain tiles are generally manufactured using more refined materials and fired at higher temperatures. They typically have lower water absorption than standard ceramic tiles, making them suitable for many high-traffic areas, bathrooms, kitchens, and outdoor applications. Porcelain tiles may have polished, matte, glazed, or textured finishes, each with different maintenance requirements.
Ceramic tiles are commonly used for bathroom walls, kitchen backsplashes, residential floors, and decorative surfaces. Many ceramic tiles have a protective glaze that provides colour, pattern, and a relatively easy-to-clean surface. However, unglazed ceramic tiles and exposed edges may absorb moisture or stains more readily.
The important point is that a tile’s surface finish matters as much as its material. A cleaning product that works well on one tile may leave marks on another. Always check the manufacturer’s care instructions before using a specialist cleaner, particularly on polished, decorative, or textured tiles.
Why Proper Tile Cleaning Matters in Dubai
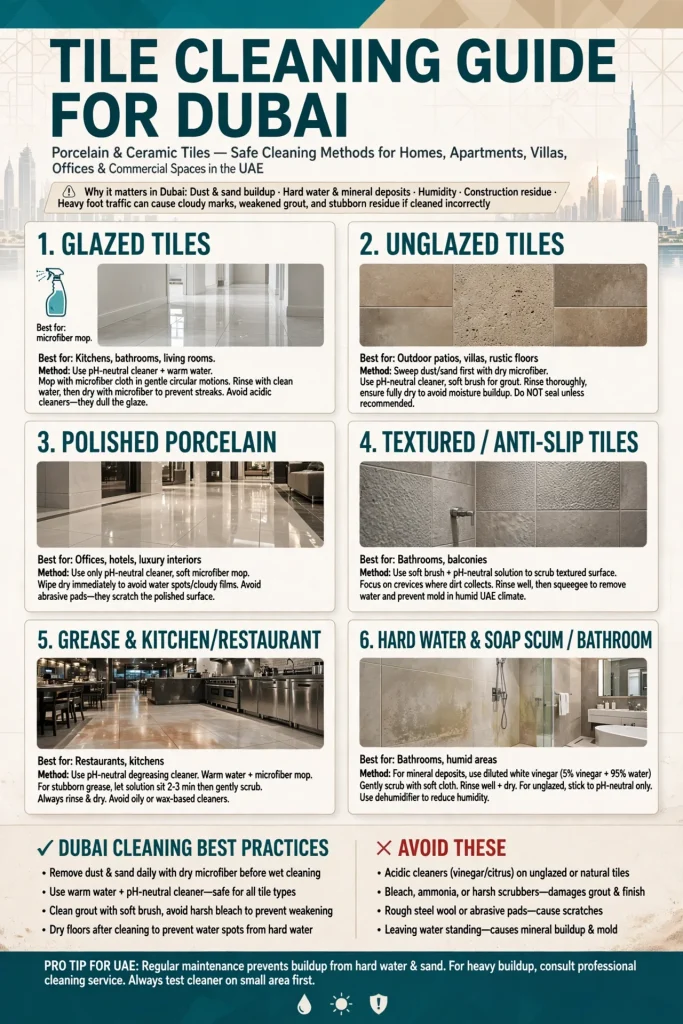
Dubai’s environment presents several challenges for maintaining clean tile surfaces. Fine desert dust and sand can enter homes through doors, windows, footwear, and balconies. When this debris is dragged across flooring, it may act as an abrasive and gradually dull certain finishes.
Hard water can also leave mineral deposits around bathroom fittings, shower floors, taps, and tiled walls. In kitchens, cooking oil, food spills, and cleaning-product residue can create sticky or greasy surfaces. Bathrooms may develop soap scum, while grout lines can collect dirt and discolour over time.
Properties in areas such as Dubai Marina, Jumeirah, Downtown Dubai, Business Bay, Arabian Ranches, and Dubai Hills Estate may have different cleaning requirements depending on the property’s layout, occupancy, ventilation, and exposure to outdoor dust.
Regular maintenance prevents dirt from accumulating and reduces the need for aggressive cleaning chemicals. It also helps preserve the appearance of tiled floors in residential properties, commercial premises, hospitality environments, and shared building areas.
Step 1: Remove Loose Dust and Sand Before Mopping
The first step in cleaning porcelain and ceramic tiles is to remove loose dirt. This is particularly important in Dubai, where fine dust and sand can accumulate quickly near entrances, balconies, and windows.
Use a vacuum cleaner with a suitable hard-floor attachment or a soft-bristled broom to remove dust, hair, crumbs, and other loose debris. Pay attention to corners, areas beneath furniture, and the edges of skirting boards, where dirt often collects.
Avoid using a stiff brush or rough cleaning pad on delicate polished surfaces. Even though porcelain is generally durable, abrasive particles trapped beneath a brush or mop can create fine scratches or gradually reduce the surface’s shine.
For busy households, placing entrance mats near exterior doors can reduce the amount of sand carried indoors. Regular sweeping is especially useful in villas, ground-floor apartments, and homes with balconies or gardens.
Removing loose debris before introducing water also prevents dirt from turning into muddy residue that spreads across the floor during mopping.
Step 2: Choose a Suitable Tile Cleaning Solution
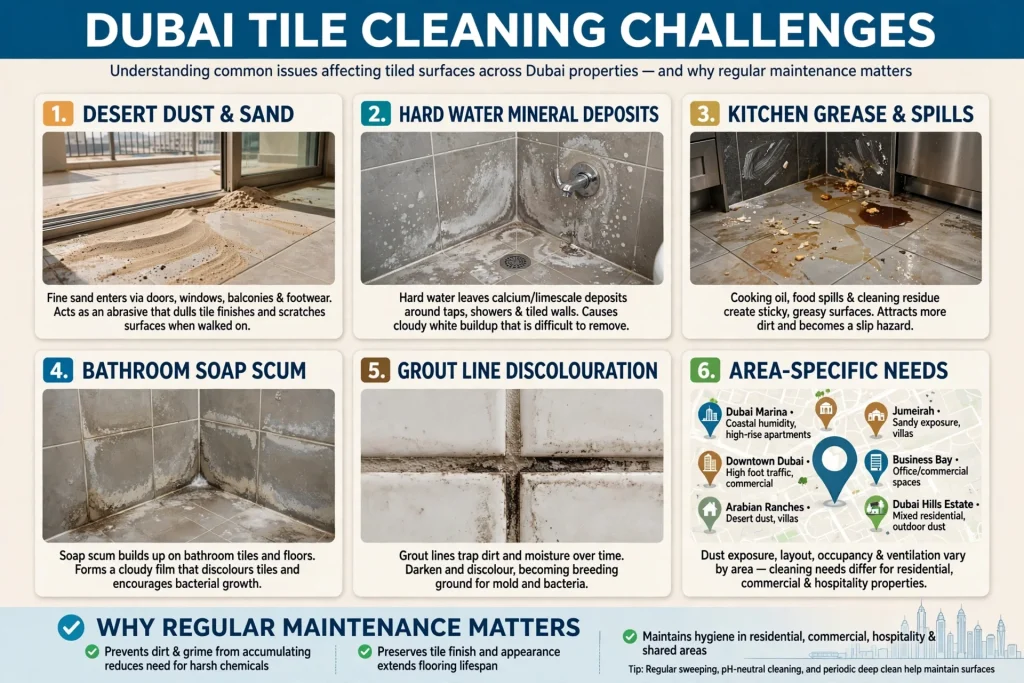
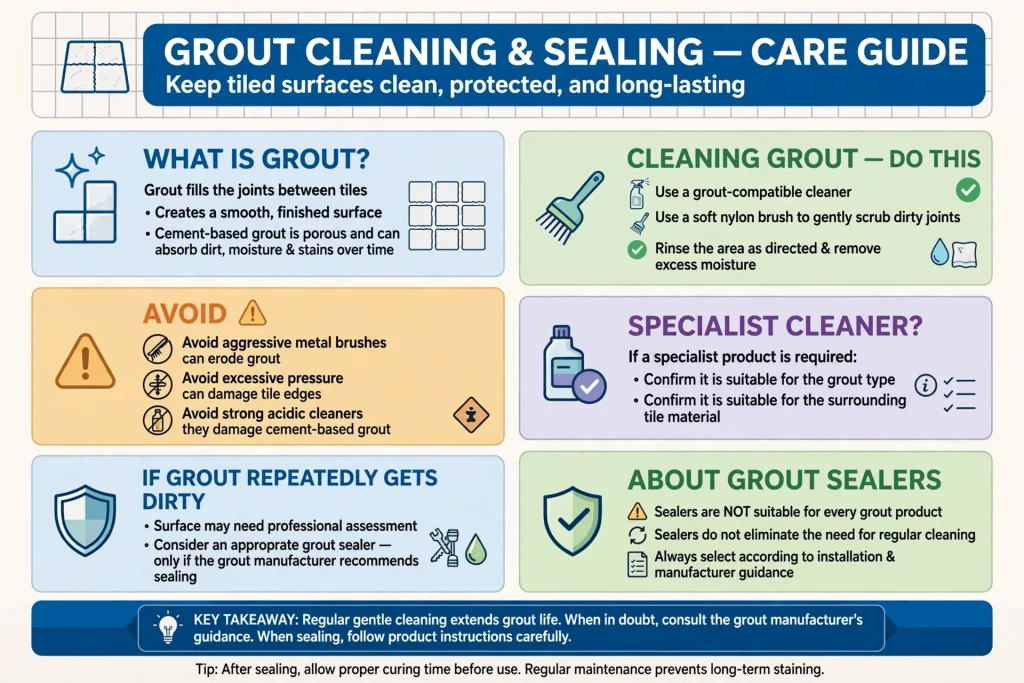
For routine cleaning, a pH-neutral tile cleaner is usually a reliable choice for porcelain and glazed ceramic surfaces. These products are designed to remove everyday dirt without relying on highly acidic or strongly alkaline chemicals.
Follow the dilution instructions on the product label. Using more cleaner than recommended does not necessarily produce a better result. Excess detergent can leave a film that attracts dust, creates streaks, or makes the tiles appear dull after drying.
For light everyday dirt, warm water and a small amount of a suitable neutral cleaner may be sufficient. Avoid assuming that all household cleaning products are safe for every tile. Strong acids, abrasive powders, bleach-based products, and highly alkaline degreasers can affect certain finishes, grout, sealers, or surrounding materials.
Before using an unfamiliar cleaner, test it on a small, inconspicuous area. Allow the test area to dry and inspect the surface for colour changes, dullness, residue, or other signs of damage.
Never mix cleaning chemicals. In particular, mixing bleach with acidic products or ammonia can release dangerous gases. Read product labels and ensure the area is adequately ventilated.
Step 3: Mop With a Microfiber Mop and Clean Water
Once loose dirt has been removed, use a clean microfiber mop or soft cloth to wash the tile surface. Microfiber helps lift dirt and distribute the cleaning solution without requiring a harsh scrubbing action.
Work in manageable sections instead of flooding the entire floor. Apply the cleaning solution according to the manufacturer’s directions, then wipe the surface evenly. Avoid leaving excessive water standing on the floor, particularly near doorways, wooden skirting boards, or unsealed joints.
Rinse the mop regularly. A dirty mop can redistribute grit and grime instead of removing it. If the cleaning water becomes visibly dirty, replace it before continuing.
For large tiled areas in villas, offices, and commercial properties, using separate washing and rinsing water can help prevent residue from building up. After cleaning, remove remaining moisture with a clean mop if necessary.
The aim is to remove the dirt rather than scrub aggressively. Consistent, gentle cleaning is usually more effective for long-term tile care than occasional heavy-duty chemical treatment.
Step 4: Rinse Away Cleaner Residue
One of the most common reasons porcelain and ceramic tiles look cloudy after cleaning is detergent residue. This can happen when too much cleaner is used, the solution is not diluted correctly, or the floor is not rinsed properly.
After washing the tiles, follow the cleaner’s instructions regarding rinsing. If rinsing is recommended, use clean water and a fresh mop to remove remaining product. Change the water when it becomes cloudy or dirty.
This step is especially useful on dark tiles, glossy porcelain, polished finishes, and surfaces exposed to strong overhead lighting. Residue may be more visible on these surfaces than on light-coloured matte tiles.
Avoid repeatedly adding more cleaning products to a floor that already looks dull. If the problem is residue, additional detergent may make it worse. A controlled rinse with a compatible cleaning method is often the better starting point.
Step 5: Dry the Tiles to Prevent Streaks
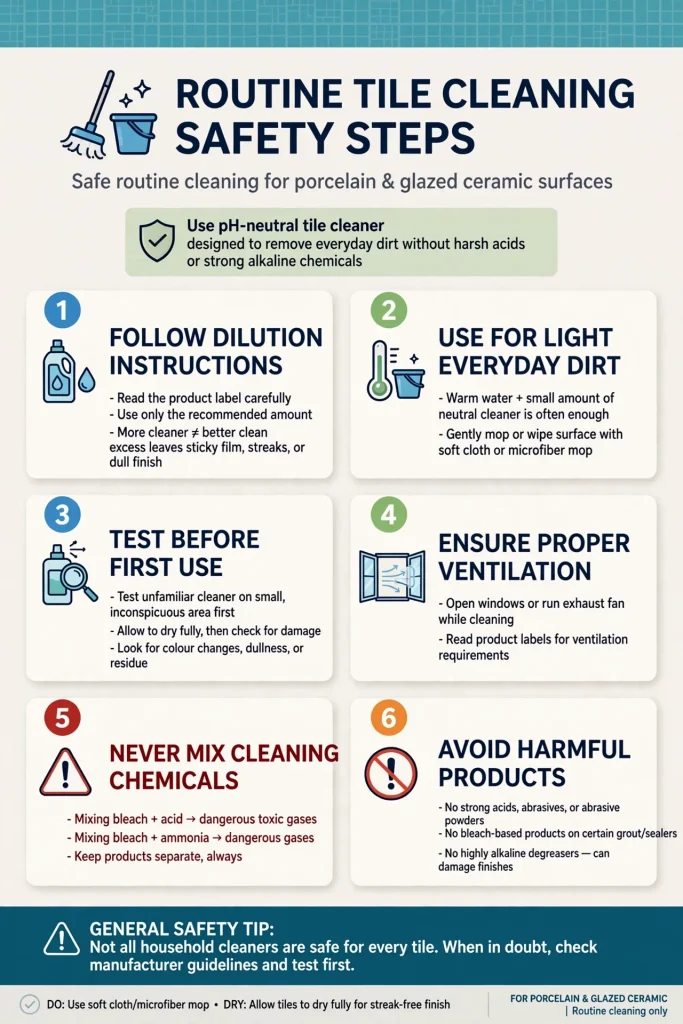
Drying helps prevent water spots, streaks, and mineral deposits, especially in bathrooms and areas where hard water is common.
Use a clean microfiber cloth or dry mop to remove excess moisture from polished porcelain, glossy ceramic tiles, shower walls, and frequently used bathroom floors. In showers, a rubber squeegee can help remove water from tiled walls and glass surfaces after use.
Where water contains a high concentration of dissolved minerals, allowing droplets to evaporate repeatedly may leave visible deposits. Wiping surfaces dry after cleaning or showering reduces this problem.
Good ventilation also helps moisture evaporate and reduces persistent dampness. In bathrooms, functioning exhaust fans and open airflow can support routine maintenance.
However, drying alone will not correct existing mineral buildup. Deposits that have already formed may require a cleaner specifically approved for the tile and grout involved.
How to Clean Polished Porcelain Tiles Without Losing Their Shine
Polished porcelain tiles have a smooth, reflective surface that can make rooms look brighter and more spacious. However, fingerprints, detergent films, water spots, and fine scratches may be more noticeable on polished finishes.
Use a pH-neutral cleaner recommended for polished porcelain and a clean microfiber mop. Avoid abrasive pads, scouring powders, steel wool, and aggressive scrubbing brushes. These tools can affect the finish or create visible marks.
Do not use wax or oil-based products simply to make the tiles appear shinier. Such coatings can create an uneven film, attract dirt, or change the intended appearance of the surface.
If polished tiles remain cloudy after routine cleaning, determine whether the cause is detergent residue, mineral deposits, construction residue, or actual surface damage. These problems require different solutions, and using a stronger chemical without identifying the cause may make the situation worse.
For newly installed polished porcelain, follow the tile manufacturer’s instructions for removing installation materials and grout residue. Construction-related haze may need a specialised product suitable for the specific tile and grout.
How to Clean Matte and Textured Tiles
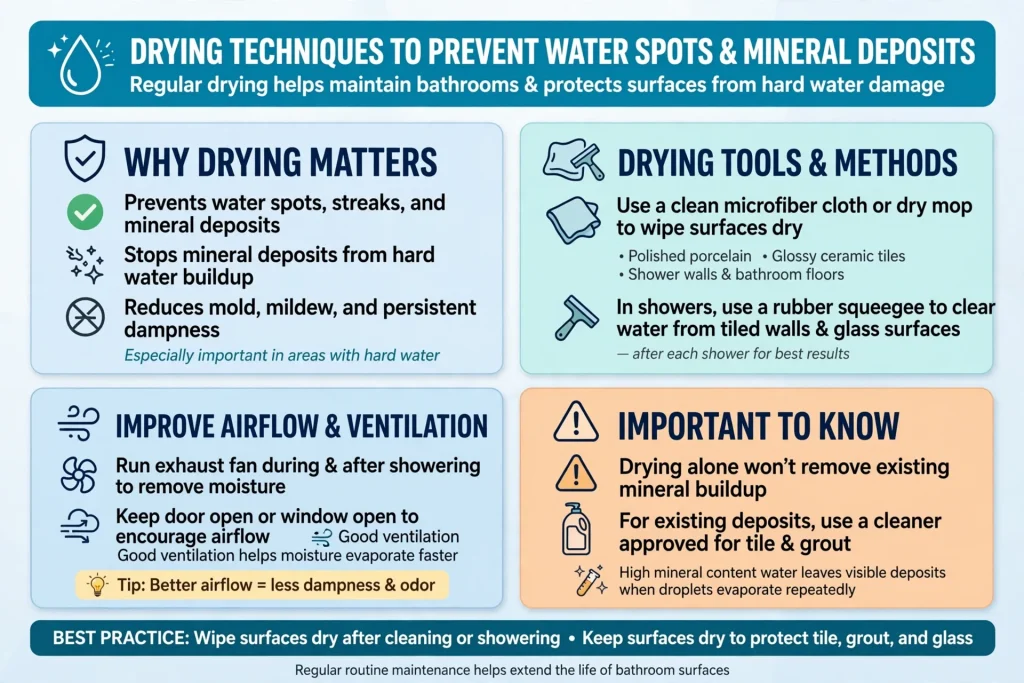
Matte and textured tiles are often chosen for contemporary interiors, bathrooms, balconies, kitchens, and outdoor areas. Their surface patterns can improve grip, but dirt may become trapped in small grooves or textured sections.
Use a suitable neutral cleaner and a soft nylon brush where additional agitation is necessary. Work gently across the texture, then rinse thoroughly so loosened dirt does not remain in the surface pattern.
Avoid using a wire brush or hard abrasive pad. These may scratch the finish, damage grout, or leave metal marks.
Textured outdoor tiles may need more frequent sweeping because sand and dust can settle into their surface. In entrances, patios, and balconies, regular maintenance is more effective than allowing dirt to build up until intensive scrubbing becomes necessary.
For stubborn grime, follow the tile manufacturer’s cleaning recommendations. If the surface is part of an outdoor installation, also consider the drainage arrangement and whether water can be safely used without affecting adjacent materials.
How to Clean Ceramic Tiles in Kitchens
Kitchen tiles are exposed to food splashes, cooking oil, grease, spills, and frequent foot traffic. The correct cleaning approach depends on whether the tiles are installed on the floor, backsplash, countertop surround, or another surface.
For everyday cleaning, remove food particles first, then use a suitable pH-neutral cleaner. Greasy areas may require a tile-safe degreaser that is compatible with the glaze and grout.
Apply the product according to its label, allow only the recommended contact time, and rinse thoroughly when instructed. Avoid spraying chemicals near food, utensils, or food-preparation surfaces unless the product is specifically approved for that use.
Clean spills promptly to prevent sticky residue and staining of grout. Areas behind cookers, near sinks, and around rubbish bins may require more frequent attention because grease and moisture accumulate there.
For tiled kitchen floors, finish by rinsing away residue and removing excess water. This helps maintain a clean appearance and reduces the risk of a slippery film forming on the surface.
How to Clean Bathroom Tiles and Remove Soap Scum
Bathroom tiles encounter soap, shampoo, body oils, moisture, and mineral deposits. Shower walls and floors may gradually develop a cloudy layer even when they are cleaned regularly.
Begin with a cleaner suitable for the specific tile finish. Routine washing with a neutral product may remove fresh soap residue before it becomes difficult to clean.
For established soap scum or hard-water deposits, a specialised bathroom cleaner may be necessary. However, some acidic cleaners can damage natural stone, certain decorative surfaces, cement-based grout, or metal fittings. Confirm compatibility before use, and never apply an acidic product simply because it is labelled for bathrooms.
After showering, use a squeegee on suitable surfaces and maintain ventilation to reduce the amount of moisture left behind. Wash bath mats regularly and check corners, shower niches, and the areas around fittings for residue.
If dark grout lines, recurring stains, or persistent damp patches remain despite cleaning, investigate whether the issue is embedded dirt, deteriorated grout, inadequate ventilation, or moisture penetration.
Cleaning Grout Without Damaging It
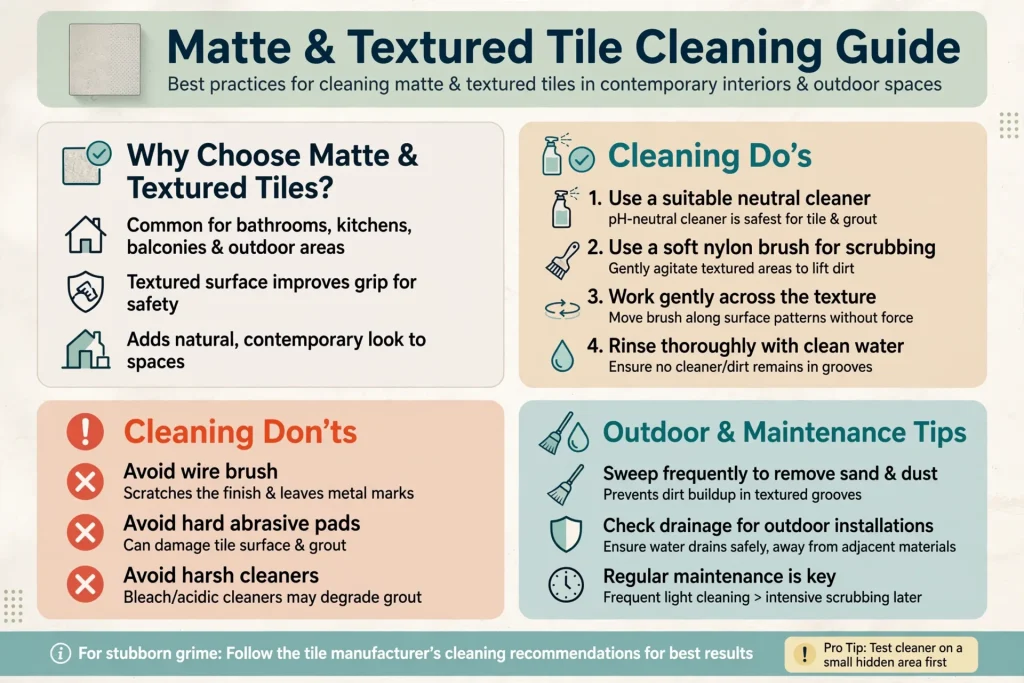
Grout fills the joints between tiles and helps complete the tiled surface. Cement-based grout can be porous, which means it may absorb dirt, moisture, and staining substances over time.
Use a grout-compatible cleaner and a soft nylon brush to work on dirty joints. Avoid aggressive metal brushes and excessive pressure, which can erode grout or damage the edges of adjacent tiles.
Strong acidic cleaners can affect cement-based grout. If a specialist product is required, confirm that it is suitable for the grout type and surrounding tile material.
Rinse the area as directed and remove excess moisture. If grout repeatedly becomes dirty soon after cleaning, the surface may need professional assessment or an appropriate grout sealer, provided the grout manufacturer recommends sealing.
Sealers are not suitable for every grout product, and they do not eliminate the need for regular cleaning. They should be selected according to the installation and manufacturer guidance.
Removing Hard-Water Marks and Mineral Deposits
Hard-water deposits commonly appear around taps, showerheads, drains, and tiled bathroom walls. These marks develop when water evaporates and leaves dissolved minerals on the surface.
Start by identifying the tile material. A cleaner that is suitable for certain glazed ceramic tiles may be unsuitable for natural stone or a sensitive decorative finish.
For porcelain and ceramic tiles, use a mineral-deposit remover only when its label confirms compatibility with the tile and grout. Test a small area first, follow the contact-time instructions, and rinse as directed.
Do not use undiluted vinegar or other household acids indiscriminately. Acids can damage cement-based grout, affect some finishes, and cause problems where natural stone is present alongside ceramic or porcelain tiles.
Preventing deposits is often easier than removing them. Wipe away standing water around taps and shower fittings, use a squeegee after bathing, and maintain regular cleaning.
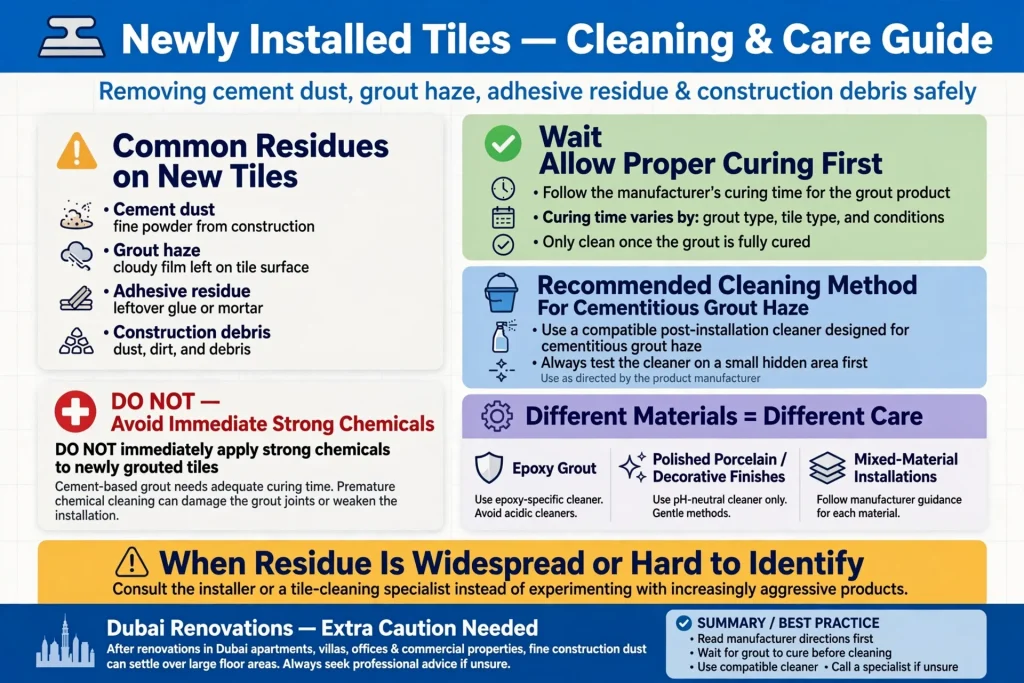
Cleaning New Tiles After Installation or Renovation
Newly installed tiles may have cement dust, grout haze, adhesive residue, or construction debris on their surface. These materials should be removed using the method recommended by the tile and grout manufacturers.
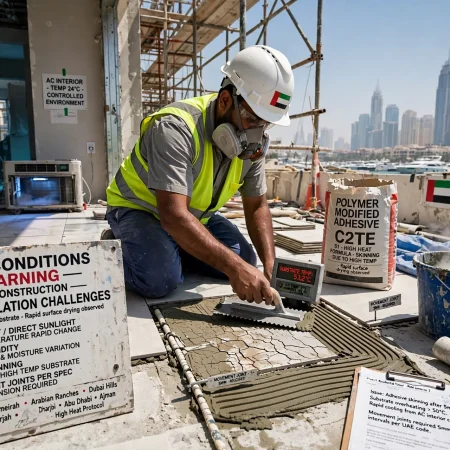
Do not immediately apply strong chemicals to newly grouted tiles. Cement-based grout needs adequate curing time, and premature chemical cleaning can affect the joints or installation.
For cementitious grout haze, a compatible post-installation cleaner may be required after the grout has cured sufficiently. The appropriate timing depends on the grout product, tile type, and manufacturer’s directions.
Epoxy grout, polished porcelain, decorative finishes, and mixed-material installations may require different procedures. When the residue is widespread or difficult to identify, consult the installer or a tile-cleaning specialist instead of experimenting with increasingly aggressive products.
This is particularly important after renovations in Dubai apartments, villas, offices, and commercial properties, where fine construction dust can settle over a large floor area.
Common Tile-Cleaning Mistakes to Avoid
Using too much detergent is a frequent mistake because excess product may leave a sticky film. Always follow the recommended dilution and rinse when required.
Using abrasive cleaning tools can scratch sensitive finishes or damage grout. Choose microfiber cloths, soft mops, and compatible nylon brushes instead.
Leaving dirty water on the floor can spread grime into grout joints. Rinse cleaning tools regularly and replace dirty water as needed.
Applying acidic products without checking compatibility can damage grout and certain finishes. Never assume that a cleaner is safe for every tiled surface.
Using wax, polish, or oil-based products can create unwanted coatings that attract dirt. Use only products recommended for the tile’s finish.
Finally, ignoring recurring stains may allow a small maintenance problem to become a larger issue. If tiles remain discoloured, feel unusually rough, or show persistent moisture marks, determine the underlying cause before repeating the same cleaning process.
How Often Should Porcelain and Ceramic Tiles Be Cleaned?
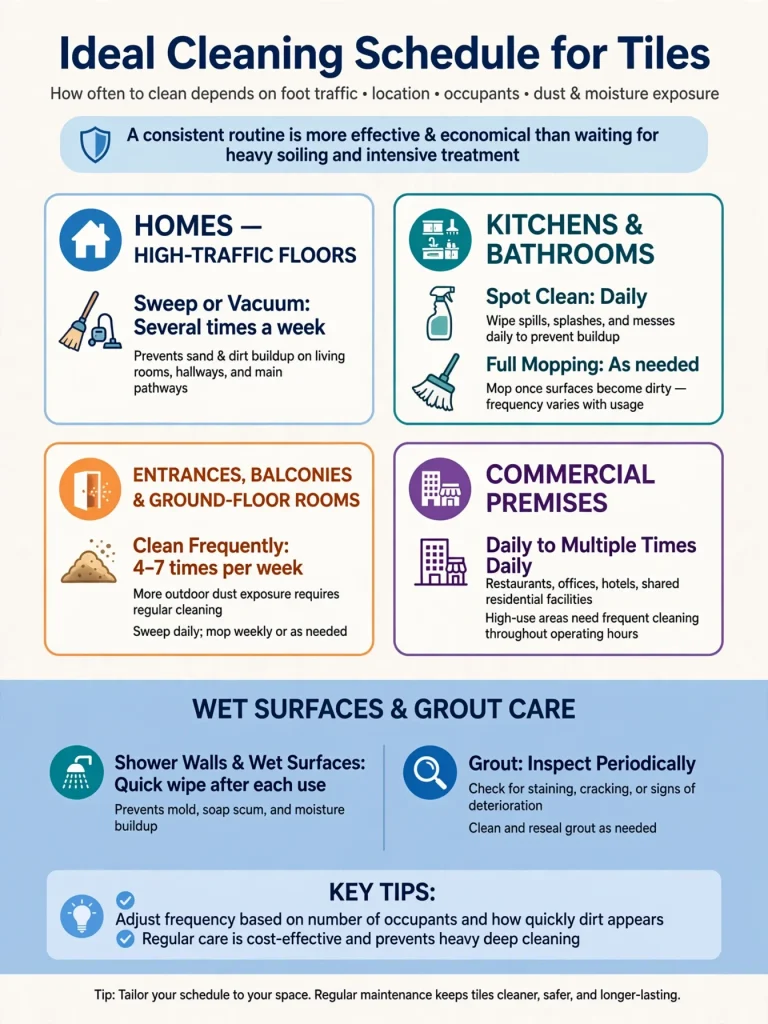
The ideal cleaning schedule depends on foot traffic, the location of the tiles, the number of occupants, and exposure to dust or moisture.
In most homes, sweeping or vacuuming high-traffic floors several times a week helps prevent sand and dirt from accumulating. Kitchens and bathrooms may need daily spot cleaning, while full mopping can be performed according to how quickly the surfaces become dirty.
Entrance areas, balconies, and ground-floor rooms may require more frequent cleaning because of outdoor dust. Commercial premises, restaurants, offices, hotels, and shared residential facilities may need daily or multiple-times-daily maintenance based on their usage.
Shower walls and other wet surfaces benefit from quick wiping after use. Grout should be inspected periodically for staining, cracking, or signs of deterioration.
A consistent routine is usually more effective and economical than waiting until the tiles become heavily soiled and require intensive treatment.
When Should You Consider Professional Tile Cleaning?
Routine cleaning can handle everyday dirt, but some problems need professional assessment. These include persistent grout discolouration, extensive construction haze, stubborn mineral deposits, damaged grout, suspected moisture problems, and heavily soiled textured surfaces.
Professional tile cleaning may involve specialised equipment, carefully selected cleaning agents, controlled agitation, and methods suited to the specific material. A qualified technician should identify the tile and grout types before selecting a treatment.
For homeowners and property managers in Dubai Marina, Jumeirah, Downtown Dubai, Business Bay, and other parts of Dubai, professional support may be useful when regular cleaning no longer restores the original appearance.
If tiles are loose, cracked, hollow-sounding, or affected by recurring water penetration, cleaning alone will not resolve the underlying problem. These signs may require a tiling contractor or a building maintenance specialist to inspect the installation.
Where repairs or new installations are needed, arranging a professional tiling service in Dubai Marina can help address tile replacement, grout repairs, or installation concerns. Replace the placeholder link with the correct service-page URL before publishing.
Choosing the Right Cleaning Method for Your Property
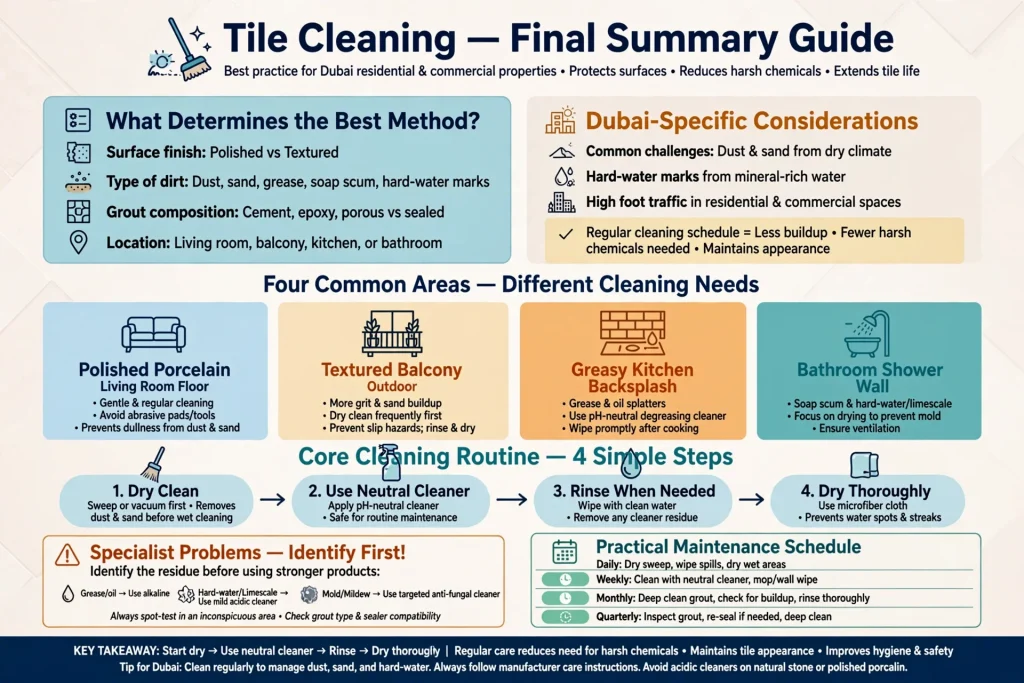
The best tile-cleaning method depends on the surface finish, type of dirt, grout composition, and location of the installation. A polished porcelain living-room floor has different needs from a textured balcony, a greasy kitchen backsplash, or a bathroom shower wall.
Start with dry cleaning, use a compatible neutral cleaner for routine maintenance, rinse when necessary, and dry surfaces where water spots are likely to form. For specialist problems, identify the residue before selecting a stronger product.
In Dubai’s residential and commercial properties, regular cleaning helps manage dust, sand, hard-water marks, and everyday wear. A practical maintenance schedule also reduces the need for harsh chemicals and protects the appearance of the tiled surface.
Final Thoughts
Porcelain and ceramic tiles can remain attractive for many years when they are cleaned with the right products and techniques. Removing loose sand before mopping, choosing a compatible pH-neutral cleaner, using microfiber tools, rinsing away residue, and drying moisture-prone surfaces are simple steps that help prevent avoidable damage.
Avoid aggressive chemicals, abrasive tools, and unverified home remedies, particularly on polished tiles and cement-based grout. Always follow the manufacturer’s care instructions and test unfamiliar products in a discreet area.
Whether you maintain a Dubai apartment, a family villa, a restaurant, an office, or a commercial property, understanding the difference between everyday dirt and more serious tile problems helps you choose the safest solution. With consistent care and professional assistance when needed, porcelain and ceramic tiles can maintain their appearance, cleanliness, and functionality for years.